
Morning – just a quick post on using a fishbone diagram to help students write more focused cause and effect texts – especially when there are multiple causes.
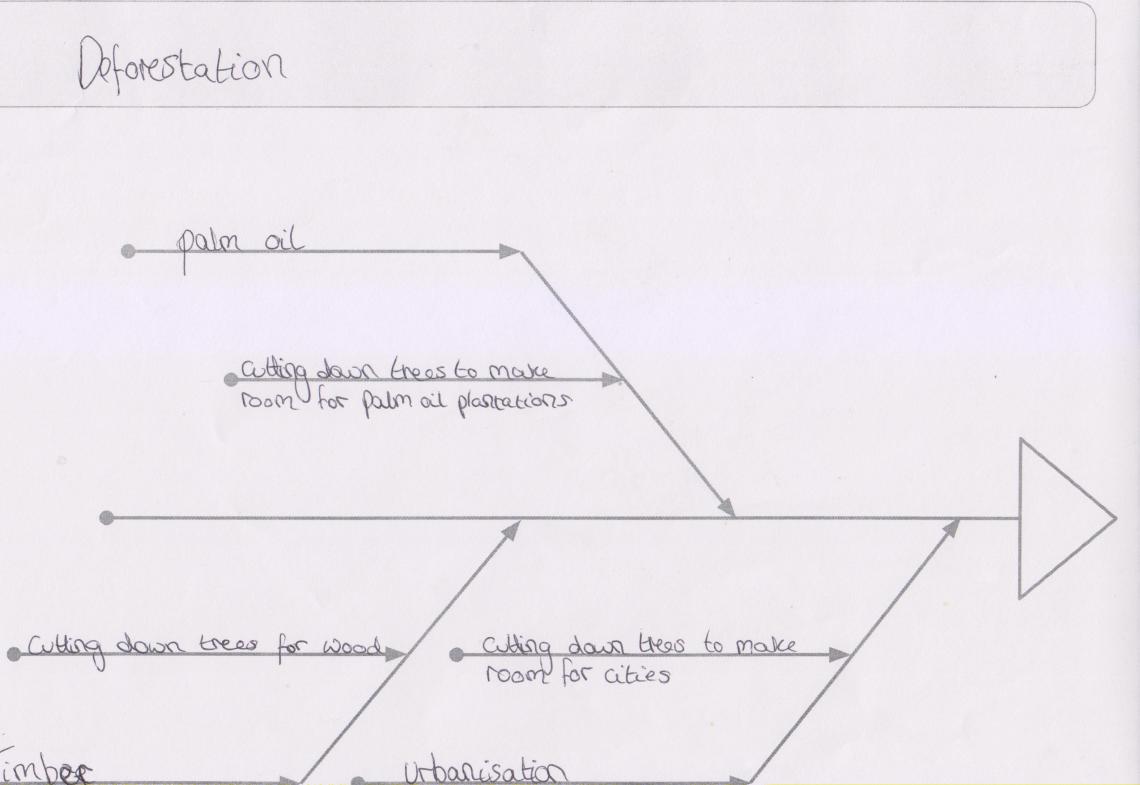
Each rib is for a separate cause contributing to the effect. Once the ribs have been completed with brief detail (which you can check as you go), the student can write a short introduction followed by a paragraph for each cause.
Advantages at the Fishbone Stage:
- Quick for the teacher to see where knowlegde gaps are (great for checking the whole class during the lesson).
- Great for supporting with vocabulary (e.g. “Instead of towns and cities, you could say urban areas.”)
- Students hate planning a text – this doesn’t feel like a plan.
- Good for revision later (they won’t re-read the text in 6 months time, but they might look at the fishbone).
- It’s quick –
Advantages at the Writing Stage:
- Students can concentrate on the quality of writing without having to hold all of the essay in their heads.
- The writing structure makes it easy to assess in class (Teach Like a Champion – Check for Understanding / Name the Lap – “This time I’m only going to look at your introduction sentence”).
- Reduces waffle.
I hope that’s useful. Let me know if you use a fishbone organiser to support writing during lockdown.
Ben
