
I have created a mini-workbook to go with this post in case it is helpful: here.
If you haven’t heard of Rosenshine’s Principles of Instruction, you are in for a treat! Back in 2012, Barak Rosenshine published a short article in American Educator magasine, which summarised his entire career of education research in just ten principles. These principles were distilled from classroom observation, psychological research and education research. The reason you should take them seriously is that these three approaches to understanding what works in the classroom all agree. Rosenshine’s 10 Principles are clear, consistent, reliable and they improve learning.

You can (and should!) read the original article (here): it is a short and engaging read. Plenty more has been written about them elsewhere. In this blog I have appled these principles to the primary science classroom. If you are new to Rosenshine, I suggest taking one point at a time and applying it in your science lesson and see how it goes.
Daily Practice

“Who remembers what we learnt in science last week?”
If you want your pupils to remember what they learnt last Monday, practise it on Tuesday and Wednesday. Keep it short and simple: true or false; tell a partner; write a sentence; label a diagram… These short questions work really well as a lesson starter or early morning work. You don’t want the questions to be hard – just let your pupils practise recalling the new information for a few days. It will stick much longer.
Example tasks:
- List three things you can push.
- Label the diagram of a flower.
- List three things which orbit the Sun.
- Tell your partner one similarity and one difference between igneous and sedimentary rocks.
Teach New Material in Small Steps
It is really easy to overload learners with new ideas. Plan your lesson so that you are only teaching one small step at a time. Let your pupils practise with each step before moving on to the next one. Don’t try to integrate each step into a big picture until your pupils are confident with each step.
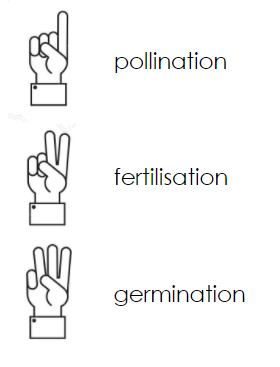
Pollination Example:
- Identify pollen first from a flower (they practise using the same flower and then different types of flower);
- explain that pollen needs to move from one flower to another – introduce the word ‘pollination’. (ask your pupils to practise explaining pollination and using the word verbally and in writing);
- identify stigmas from a couple of flowers (they practise identifying stigmas from the same flowers and then a variety of flowers);
- show your pupils how a honey bee carries pollen from one flower to another. (They practice explaining with other pollinating insects including bumble bees, butterflies, hoverflies, wasps, moths, beetles, etc.
Ask Lots of Questions

Teachers with pupils who remember more ask lots of questions. The trick is to get everyone answering. Cold-Call is good, but you can only ask one pupil at a time. You can get more pupils thinking of the answer is you ask the question… pause… then call a name (these two are from Teach Like a Champion by Lemov).
Even more pupils have to answer if you use mini-whiteboards or finger voting.
Provide Models

You want your pupils to produce good quality work – but do they know what that looks like?
Show them what you are looking for and what they are aiming towards. Make the abstract concrete. It could be a piece of writing, a labelled diagram, a chart or results table or it could be a practical skill, such as measuring temperature.
A great strategy is “I-do, we-do, you-do’:
- I-do: Model the activity first, with thinking aloud.
- We-do: Repeat as a whole class (maybe use a similar, but not identical example).
- You-do: Pupils practise the task.
Guide Pupil Practice

Once you have taught pupils how to do something – read a thermometer; label a diagram; use the word ‘photosynthesis’ in a sentence – they need to practise it. Guide them while they are doing the task. Check every pupil to make sure they are practising correctly.
Check Pupil Understanding

When you plan your lessons, build in plenty of opportunities to check whether your carefully constructed explanation has been understood (clue: it never is!). Don’t rely on asking a couple of pupils: you’ll miss the ones who haven’t got it.
Suggested whole-class checking strategies
- Use mini-white boards or finger voting.
- Ask pupils to tell their partners and listen in to as many pupils as you can.
- Ask them to write the answer and make a lightning lap of the classroom to check.
The key to good checking is asking the right question – don’t wing it – plan them.
Aim for a High |Success Rate

Set tasks which pupils can complete successfully. When you quiz your pupils, aim for 80% – they will remember more for longer.
This doesn’t mean your tasks have to be easy – just that pupils need to get them right. If you find that children are getting your task wrong, redesign the task. Break it down into smaller steps; practise each step; build the steps into the full task. Scaffold it.
Scaffold Difficult Tasks

Your pupils need to learn to do difficult things in science. They need to interpret charts. They need to measure temperatures and forces. They need to write sentences and paragraphs about complex ideas.
Scaffold these tasks. Think of the one thing you want them to get better at in the task and get them to practise that. Remove the other elements of the task until they are ready to practise those.
Example Scaffolds
- Practise in simple familiar contexts. E.g. if you are doing an experiment with measurements, practise measuring measuring in simplified situations before you measure in the real situation. You might practice measuring the temperature of a cup of tea, or some plasticine. You might practise using stop clocks or force meters before using them in an investigation.
- Make your examples similar to the task. For example, you might label a simplified daffodil diagram on the board to show the anthers, stigma etc. They can practise using a simplified tulip picture which is very similar.
- Model the task clearly – show them on the board how to do it. Think aloud to model your thinking.
- Use sentence starters and gap-fill exercises.
- Use advance orgasnisers to help pupils see the big picture first. These are commonly used for pupils with special additional needs, but they are good for everyone.
Provide Opportunities for Independent Practice

To really embed learning, your pupils need an opportunity to practise independently (don’t do this before they are ready).
Give your pupils to practise starting with simple versions of the task, but building up to include:
- new contexts and examples;
- greater complexity;
- reading/writing/discussion;
- problem solving;
- investigations / enquiry…
Practise Over Time

You spent a lot of time teaching important scientific ideas. Your pupils invested a lot of effort learning them. Don’t let that learning fade away. You need to maintain that knowledge.
Plan to include ‘re-heat’ tasks to keep the learning fresh in your pupils’ memories. Quizzes work really well; early morning settling tasks and lesson starters are a great way to build this into your daily routines.
Example activities
- Lesson starter quizzes
- Quickfire Q+A
- “Label this diagram/photo with as many scientific ideas as you can.”

In Short…
Rosenshine’s principles are ten simple strategies which have been shown to improve pupil learning in many different contexts. Apply them in your classroom when you teach science to help your pupils remember more, understand more and do more with their scientific learning.
I’d be really please to hear if you found this post useful. If you are already using Rosenshine’s principals in your science teaching, great. If you try something new as a result, I’m delighted. Please let me know how it goes!
Ben

1 Comment